This section on user preferences is by no means comprehensive. The number of options available in Blender’s Preferences editor is mind-bogglingly large. My intent here is to introduce you to the most helpful and relevant options to get you working effectively. For specific details on every single button, see the online documentation.
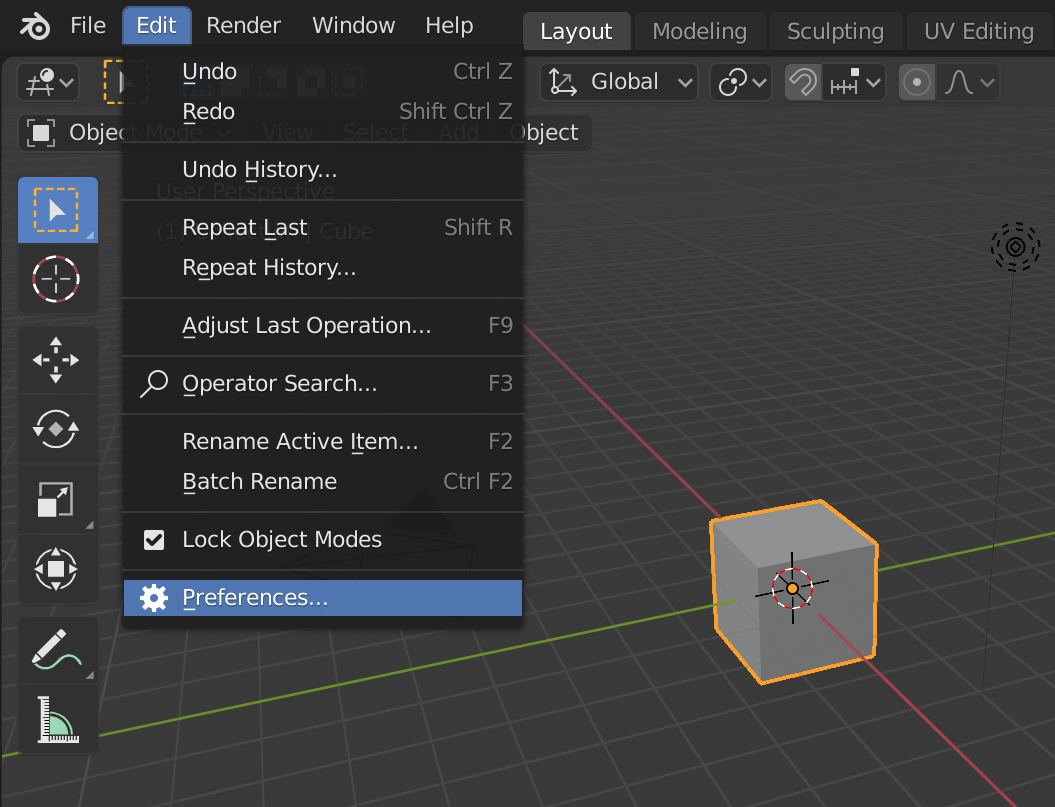
Of course, the first question is, “Where exactly are the controls for user preferences?” Well, the Preferences editor is just like any other editor in Blender and can therefore appear in any area you want it to by using the Editor Type menu in the header region of any editor. (For more information, see the section “Looking at Editor Types,” in Chapter 2.) Of course, you can also choose Edit→Preferences, and Blender creates a new window just for the Preferences editor. Although creating a separate window is a bit of a violation of Blenders non-overlapping philosophy, it is sometimes nicer because you don’t have to replace or split any of your existing areas to get a Preferences editor. Also, it’s unlikely that you’ll be modifying your preferences frequently while working on a Blender project, so the chances a low that this overlapping window will get in your way.
If you choose Edit→Preferences, and you don’t see a new window with the Preferences editor, your Blender window may be in a full-screen state and your operating system’s window manager may not be allowing the window with Preferences to sit atop that full-screen window. To get around this issue, toggle off the full-screen view by choosing Window→Toggle Window Fullscreen.
By default, Blender automatically saves any changes you make in the Preferences editor so they’ll persist to the next time you launch Blender. If you don’t want this auto-save behavior, click the button with the three-line icon (sometimes called a hamburger menu). You’ll get a menu that includes a toggle option for Auto-Save Preferences. Click that menu item to toggle it off. With auto-save disabled, you manually chose to save them as your personal defaults by clicking the Save Preferences button at the bottom of the Preferences editor next to the hamburger menu.
Interface
The first set of available options in Blender’s Preferences (shown in the next figure) relate to how you interact with your scene within the 3D Viewport.
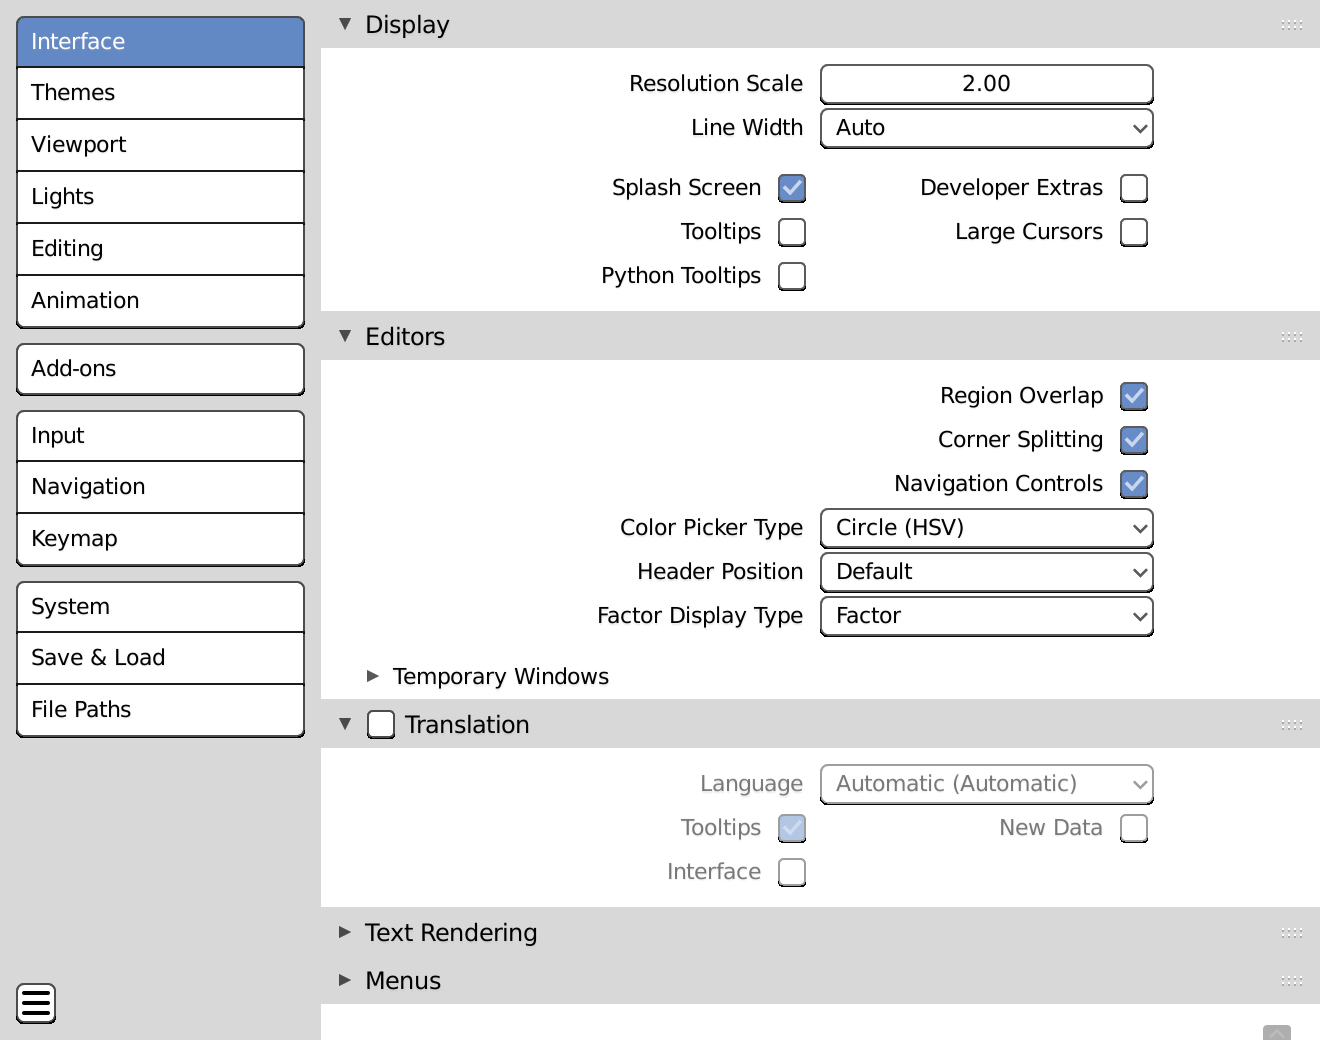
Moving from top to bottom, here are some of the more useful options:
- Display: The check boxes in this panel toggle the display of various informational elements in the 3D Viewport, such as tooltips, object information, and large cursors (if you happen to be using Blender on a high DPI monitor. The Resolution Scale and Line Width controls may also be of use to you if you’re working with high DPI.
- Editors: The options in this panel are for global controls that affect all editor types. In particular, there are a couple options worth focusing on:
- Region Overlap: This check box (enabled by default) allows the regions in your editors (like the Sidebar in the 3D Viewport) to be semitransparent. More importantly, they behave like they’re overlapping the editor space. If you disabled this check box, the regions will push into the editor area and compress your workable space.
- Color Picker Type: Blender gives you the option of a variety of ways to choose colors while working. The default is a circular hue, saturation, value (HSV) color picker. It’s generally faster to use for choosing colors when painting. However, everyone has different tastes in what color pickers they prefer to use, and some color pickers are better than others for specific purposes. For that reason, a drop-down menu contains a selection of different color pickers that you can use in Blender. If you’re familiar with programs like GIMP or Photoshop, you may be more comfortable choosing the Square (SV + H) option.
- Temporary Windows: If, like me, you prefer to have Blender maintain its single-window, non-blocking layout even when opening files or rendering, the controls in this subsection allow you to adjust how Blender handles temporary windows like those.
- Menus: The options in this panel relate specifically to controlling how menus behave in Blender.
- Open on Mouse Over: Some users prefer to have menus immediately pop open when they run their mouse cursor over them. The options under this heading facilitate that preference. It’s disabled by default, but you can enable the Open on Mouse Over check box and then use the values below that to adjust the delay, or how long your mouse has to be over a menu’s name before it pops up.
- Pie Menus: menus are a menu type in Blender that I cover at the end of Chapter 1. The settings here offer a little control over how the pie menus appear, and for how long.
Themes
Blender has quite a bit of flexibility in adjusting how it looks, thanks to the Themes options, shown in the next figure. I took almost all the screenshots for the book using a variation of the Default theme that I created, lightened for readability in black-and-white print. However, when I work in Blender, I use my own theme that’s a bit darker and easier on the eyes. Darker themes are particularly helpful if, like me, you’re known for sitting behind the computer and working in Blender for 10- to 15-hour stretches (or more). In those situations, the less stress you can put on your eyes, the better.
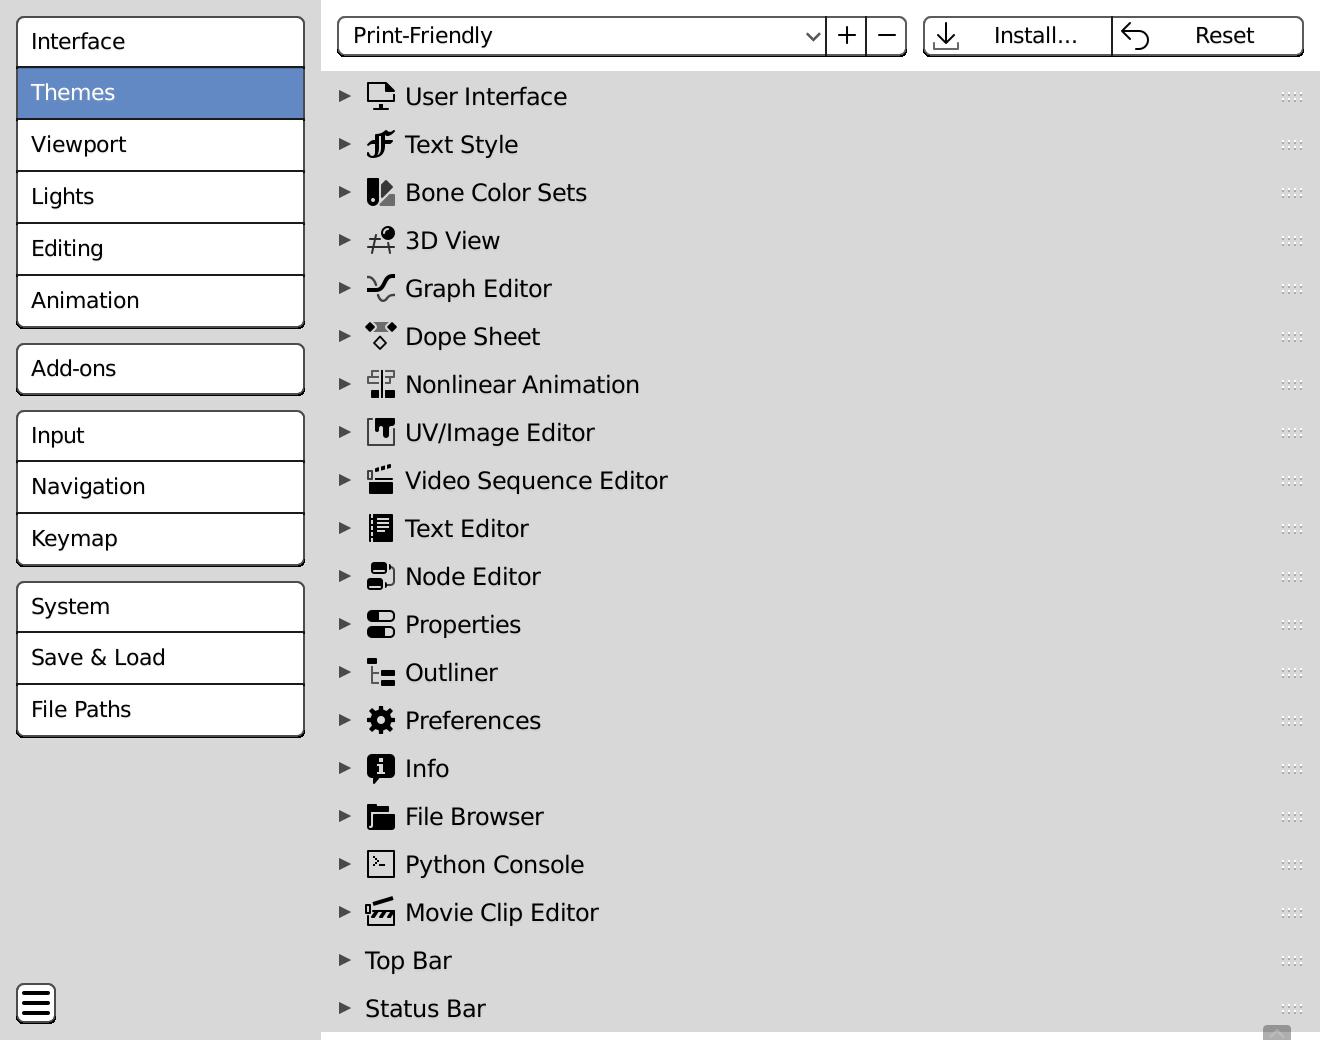
I have a copy of the theme I use in the book and on this site over here. Feel free to use this theme for your Blender sessions or make your own! Everyone has their own tastes. In fact, one of the more popular Blender users, Pablo Vazquez, used to have a theme that’s completely purple and pink!
Viewport
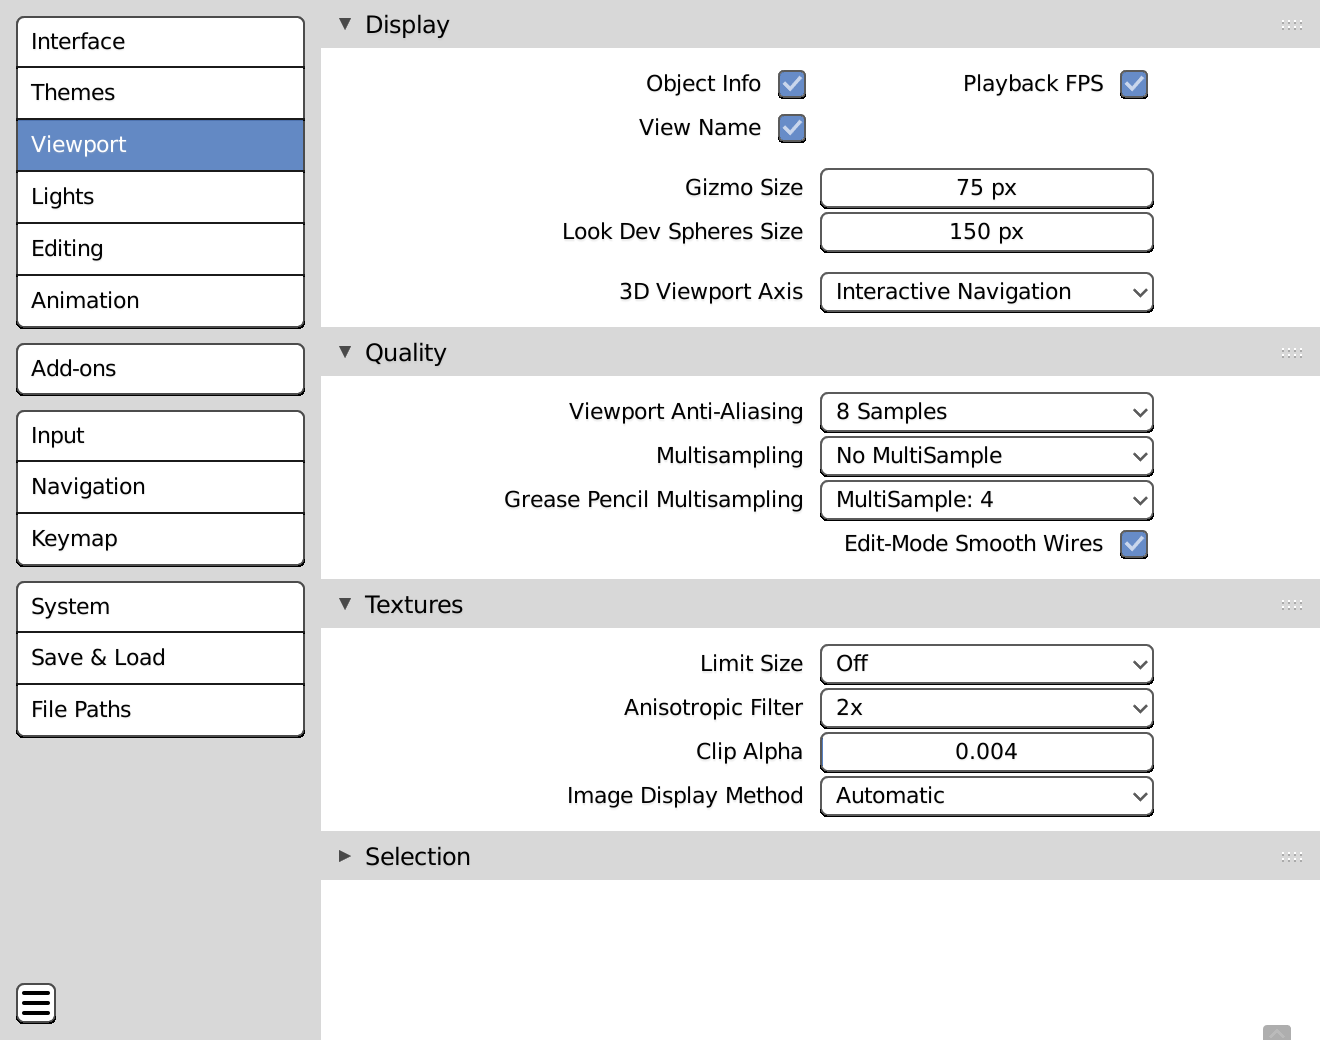
Because most users will spend the majority of their time in the 3D Viewport, it makes sense that Blender has a whole section in Preferences dedicated to how the 3D Viewport looks and behaves. As a new user, you’ll probably want to keep these options all at their default values.
The only exception I might recommend would be the options in the Quality panel. If you have an older computer or a low-powered video card, the default quality settings might make Blender a bit too slow for you. You may want to try setting the Viewport Anti-Aliasing option to No Anti-Aliasing. Likewise, if you’re working with Grease Pencil, you might want to try lowering the Grease Pencil Multisampling value. The next figure shows the Viewport options available in Preferences.
Lights
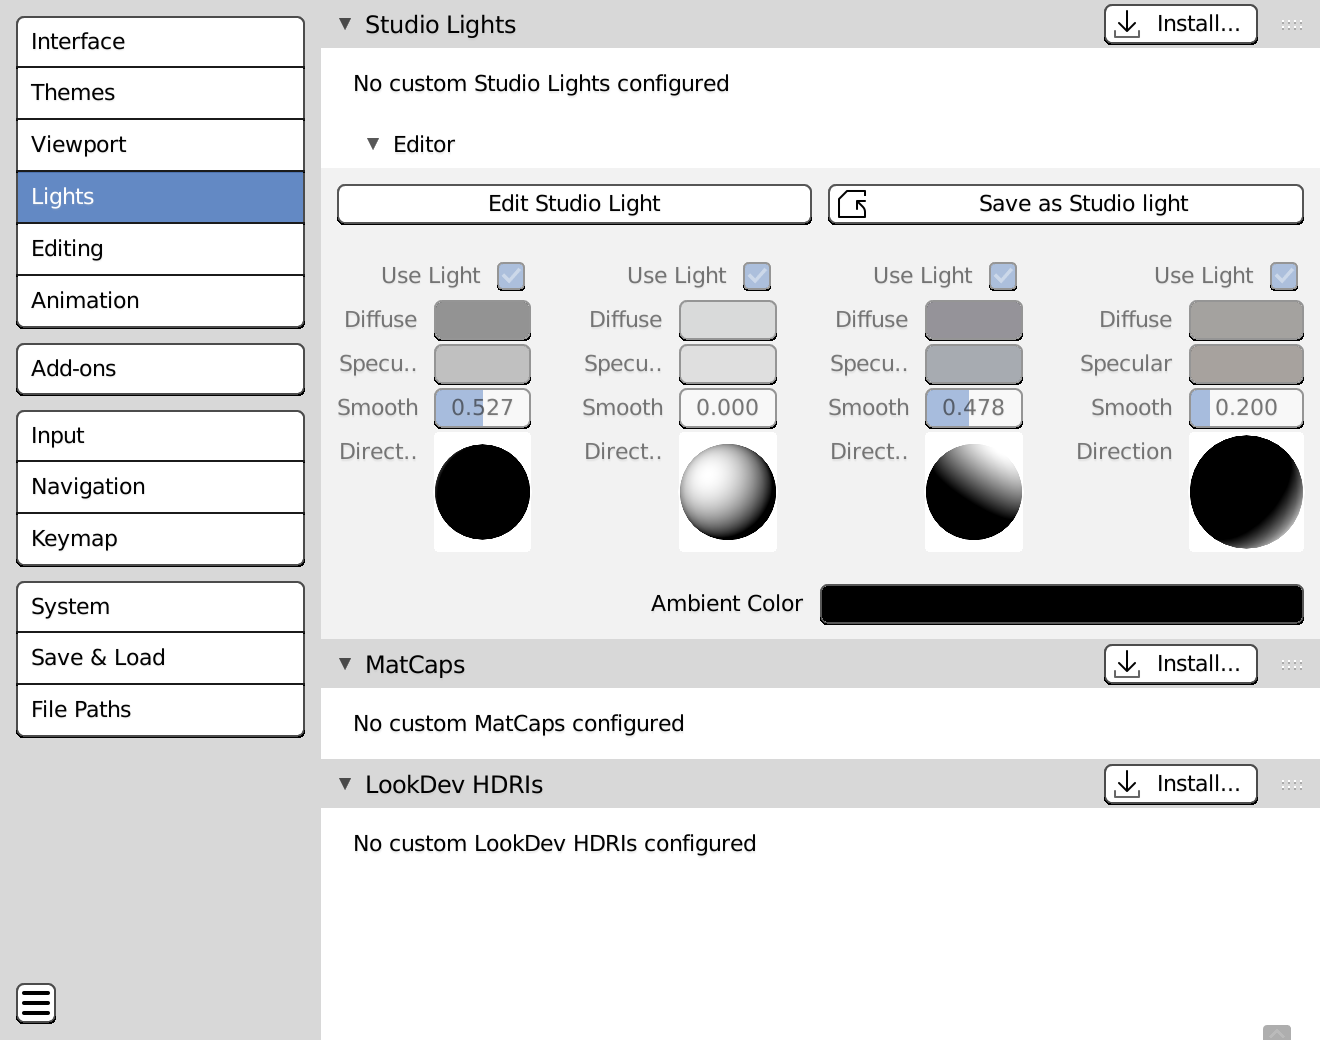
Even if you haven’t set up any lighting in your 3D scenes (see Chapter 10 in the book for more on lighting), Blender has some default lighting that you can use while working on your scenes. The lighting configurations are broken up into three panels, based on how you’re working:
- Studio Lights: Studio lights control the standard lighting used in your 3D Viewport when working in Solid viewport shading. Some Blender users like to have a custom studio light setup with drastically different settings per light so that they can have a good sense of each side of their model and more easily see some of the contours. By default, you should notice that there are no custom studio lights, but you can edit the existing studio lights by expanding the Editor sub-panel. From there, you have the ability to enable up to four lights. On each one, you can adjust the direction of the light by clicking and dragging the shader ball widget. You can adjust either of the two colors for the light (main and highlight, or diffuse and specular, respectively) by left-clicking them and using the color picker that pops up. Once you make a custom studio light setup, you can save it by clicking the Save as Studio Light button. From there you can name your setup and it’s added under the Studio Lights panel.
- MatCaps: Short for “material capture,” matcaps are particularly helpful when sculpting and modeling (see Chapters 5 and 6). A matcap is basically a small image of a material rendered on a ball. Blender takes the colors on that image and can remap them to the objects in your 3D Viewport. By default, Blender ships with an assortment of 23 different matcaps, but if you’re enterprising enough to create your own matcaps, you can load those images in this panel and they’ll be available in any Blender project you start.
- LookDev HDRIs: Holy abbreviations, Batman! Breaking these down a bit, Look Dev is short for “look development,” the process of refining the materials and shaders on objects in your scene. Blender has a specific Look Dev shading mode that can help you with this process (it’s what’s used on the Shading workspace tab). An HDRI is a high dynamic range image, a special kind of image that also incorporates lighting. These images can be very large, and Blender actually ships with eight of them that you can use. But like with matcaps, you can get or create your own HDRI images and load them here so they’re available any time you go into Look Dev mode. See Chapters 8 and 9 for more on using Look Dev to refine your objects’ materials.
The following figure shows the Lights section of Preferences with the Studio Lights editor expanded.
Editing
The next set of options is related to the act of editing objects. Pretty much everything in this section is best left at their default values, as shown in this figure.

That said, there are two panels where you may want to make an adjustment:
- Annotations: Annotations are a cool way that you can leave notes to yourself or people you’re collaborating with, right within your Blender project itself. This sub-panel gives you controls of the default starting color and eraser size for your annotations. You can, of course, change those values while you’re working, but it’s nice to have defaults that you’re comfortable with.
- Weight Paint: This panel is collapsed by default, but it’s an important one to take note of if you have trouble perceiving specific colors. Weight painting is the process of controlling how much weight, or influence, a vertex group has over a specific vertex in your mesh. I cover weight painting in more detail in Chapter 12. By default, Blender uses a kind of heat map color scheme for visualizing vertex weights. In the general case, this default works well, but it can be difficult to use for people with color blindness. Using the Weight Paint panel in this section of Preferences, you can change that default heat map gradient to any gradient you want by enabling the Use Custom Colors check box.
Animation
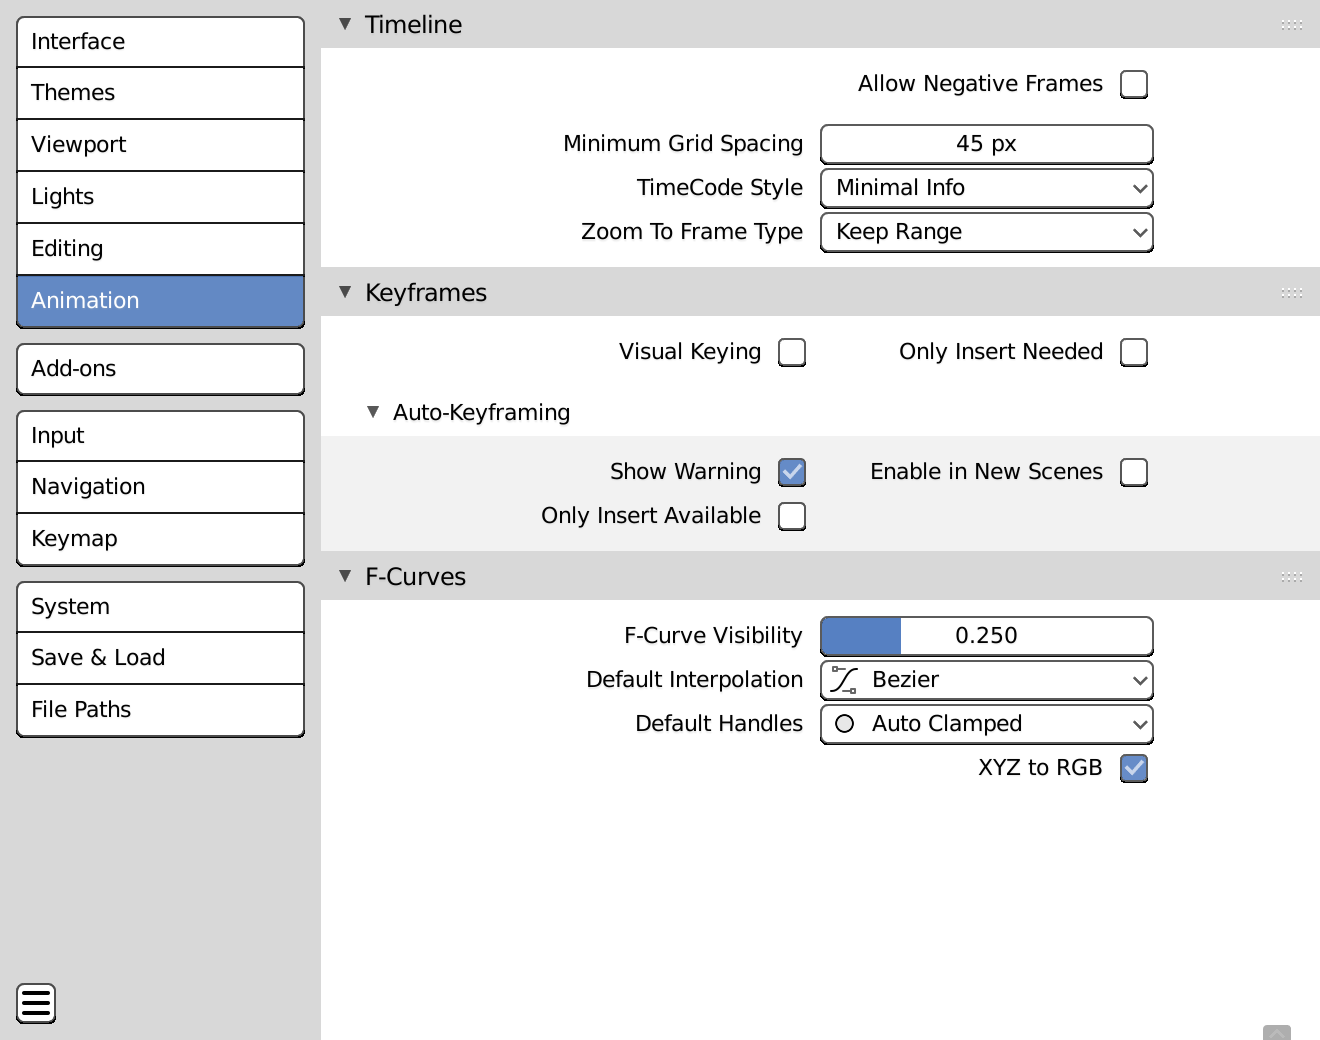
The options available in the Animation section, shown in the next figure, specifically affect the animation editors like the Timeline, Dope Sheet, and Graph Editor. As a beginner, I recommend that you keep all these options at their default values. As you gain more experience animating in Blender, you may find it useful to always allow negative frames or ensure that Blender always uses visual keying (visual keying is covered in Chapter 11). However, those are tastes that you develop as you go and gain an understanding of how you like to work.
Add-ons
Blender ships with an assortment of extensions, called add-ons, which provide users with additional capabilities within Blender. For example, if you create a lot of vegetation in your scenes, you might find Blender’s ivy generator or tree generator add-ons useful. Other add-ons modify Blender’s interface, add new primitive objects, or provide additional tools that can help speed up your work. Another key feature of add-ons is that they are tightly integrated into Blender’s interface. Once an add-on is enabled, its functionality looks and works just like native features in Blender, like it was there all along!
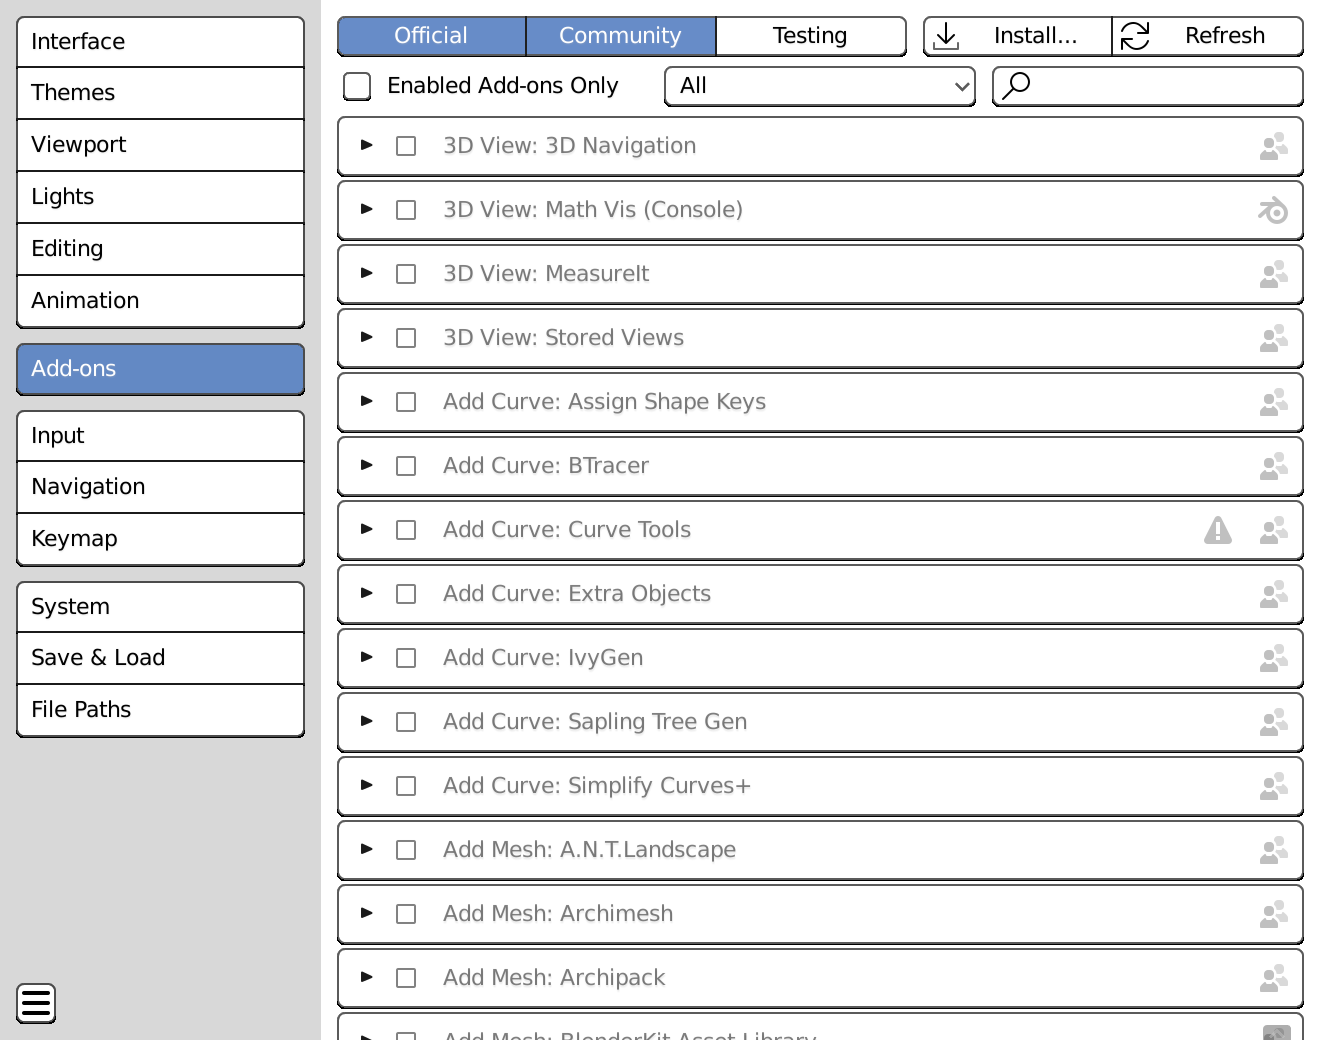
You can manage all add-ons from the Add-ons section of Preferences, as shown in this figure.
There are three types, or support levels, for add-ons:
- Official: These add-ons officially ship with Blender on release. Blender’s core development team supports them and ensures that they continue to work with each Blender release.
Although these add-ons come with Blender, they aren’t all enabled by default because some of them favor very specific workflows. - Community: These add-ons also officially ship with Blender on release. However, rather than being supported by the core developers, the add-ons at this support level are maintained by community developers (usually the people who first wrote them). None of these add-ons are enabled by default, but many of them are very useful.
I’m not just saying that because I wrote one of them. I promise! - Testing: There are two kinds of add-ons at this support level:
- Very new add-ons that haven’t been thoroughly tested by users
- Veteran add-ons that aren’t actively maintained and supported by any developer
The Testing add-ons don’t ship with Blender’s official release, but you can find some of them on the Blender developer wiki. That said, the best way to find out about new and useful add-ons is by looking on some of the various Blender community websites. All of Chapter 21 is devoted to these sites.
You can use the buttons at the top of the Add-ons section in Preferences to filter the add-ons you see according to support level. By default, all community supported add-ons that ship with Blender are disabled. Most of the officially supported add-ons are for importing and exporting file types to and from other programs. The bulk of these are enabled by default. To enable or disable a specific add-on, follow these steps:
- Find the add-on that you’re interested in enabling.
- Left-click the check box on the left side of the add-on’s box.
Left-clicking the triangle on the left of the box expands it so that you can get more details about a specific add-on.
That’s it! The add-on is enabled. Depending on what the add-on does, you should be able to find it in the interface and use it immediately.
All of Blender’s add-ons are broken down into specific categories, and you can use the drop-down menu at the top to see just the add-ons specific to a single category. Alternatively, you can use the search field just to the right of the categories dropdown.
Input
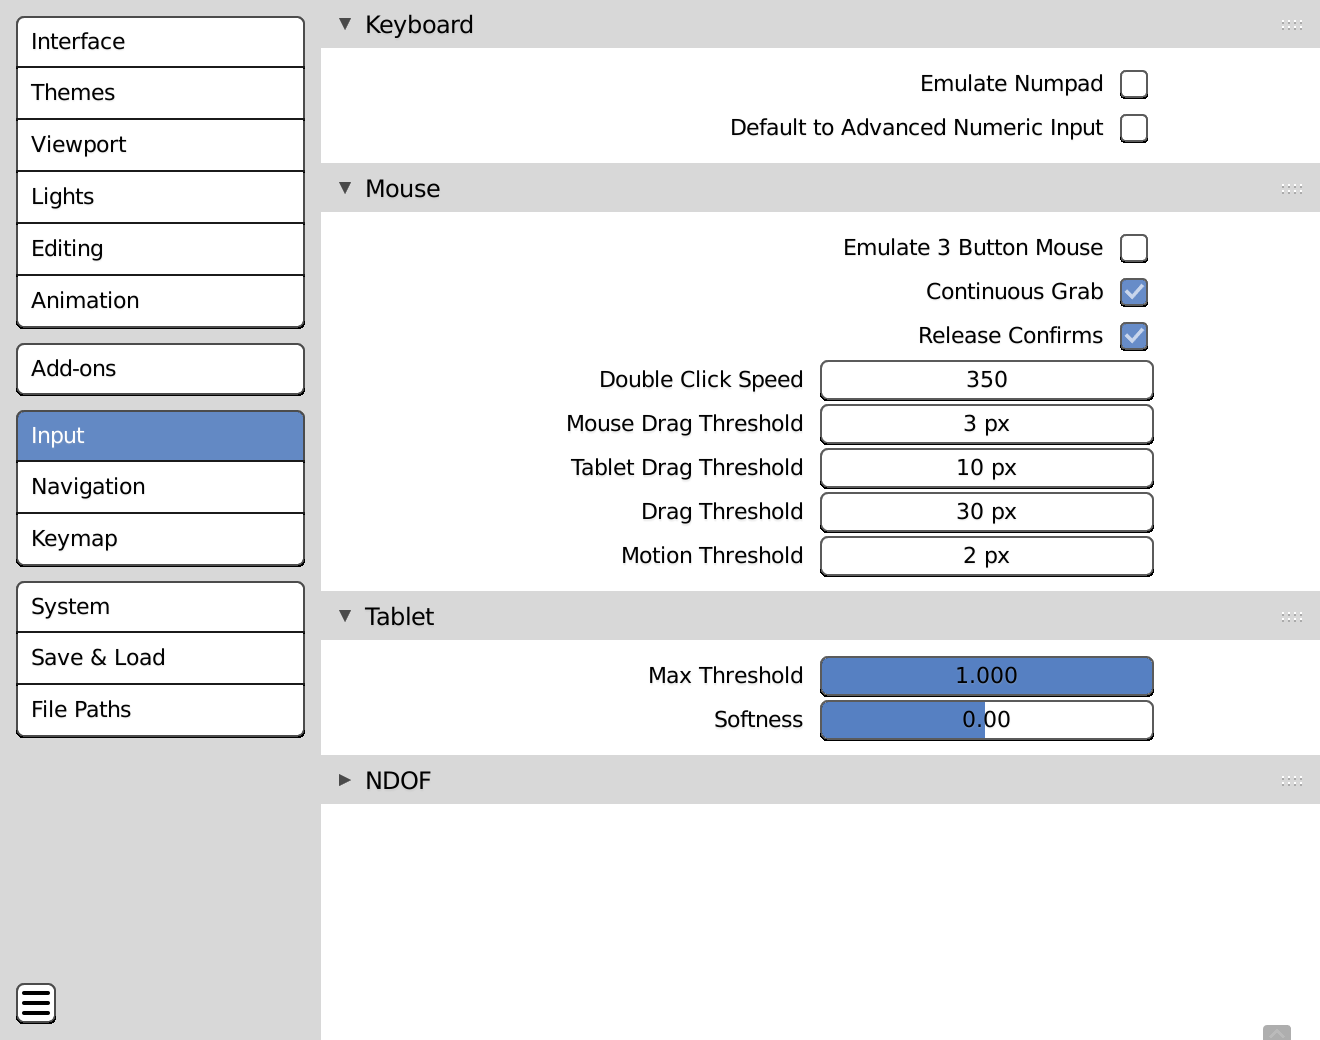
You can interact with Blender with all kinds of input devices, from the traditional keyboard and mouse to drawing tablets and multi-degree-of-freedom input devices (called NDOF devices; the N is meant in the mathematical sense where N is a variable that could be any number of values). In future releases of Blender, there may even be support for virtual reality interfaces. Whichever way you interface with Blender, the Input section of Preferences, as shown in this figure, is where you can configure how those devices behave.
Some of the options you might most be interested in adjusting are as follows:
- Emulate Numpad: This setting in the Keyboard panel is a very handy option for laptop users. As I cover in the “Navigating in Three Dimensions” section of Chapter 2, Blender makes use of the numeric keypad for quick access to top, front, side, and camera views in the 3D Viewport. Unfortunately, most laptop users don’t have an easily accessible numeric keypad on their keyboards. As a workaround, the Emulate Numpad option uses the number keys at the top of the keyboard to have the functionality that the corresponding Numpad numbers have. This control in Preferences disables the normal functionality that the number keys at the top of the keyboard normally perform, but the ability to quickly change views tends to be more valuable to users.
- Default to Advanced Numeric Input: One of the really cool things that Blender does is allow you to use arbitrary mathematical functions when moving, rotating, or scaling a selection. That feature is called Advanced Numeric Input and by default, you have to press the Equal key (=) to activate it while transforming. However if you’re the sort of person who uses this feature all the time, then you may want to enable the Default to Advanced Numeric Input check box in the Keyboard panel. Then you don’t have to press Equal at all.
- Emulate 3 Button Mouse: Blender was designed to be used with a three-button mouse. However, not all computers have three-button mice, and some artists prefer to work with drawing tablets that don’t have an easily accessible middle mouse button. Enabling this option in the Mouse panel helps these users compensate by using Alt+left-click to do what is normally done with the middle-click.
- Continuous Grab: Continuous Grab is a cool feature that allows you to continue moving an object even after your mouse cursor has reached the edge of the editor. Continuous Grab is very useful and enabled by default, but it doesn’t work as nicely for users working with a tablet interface, so you can disable it here if you need to.
Navigation
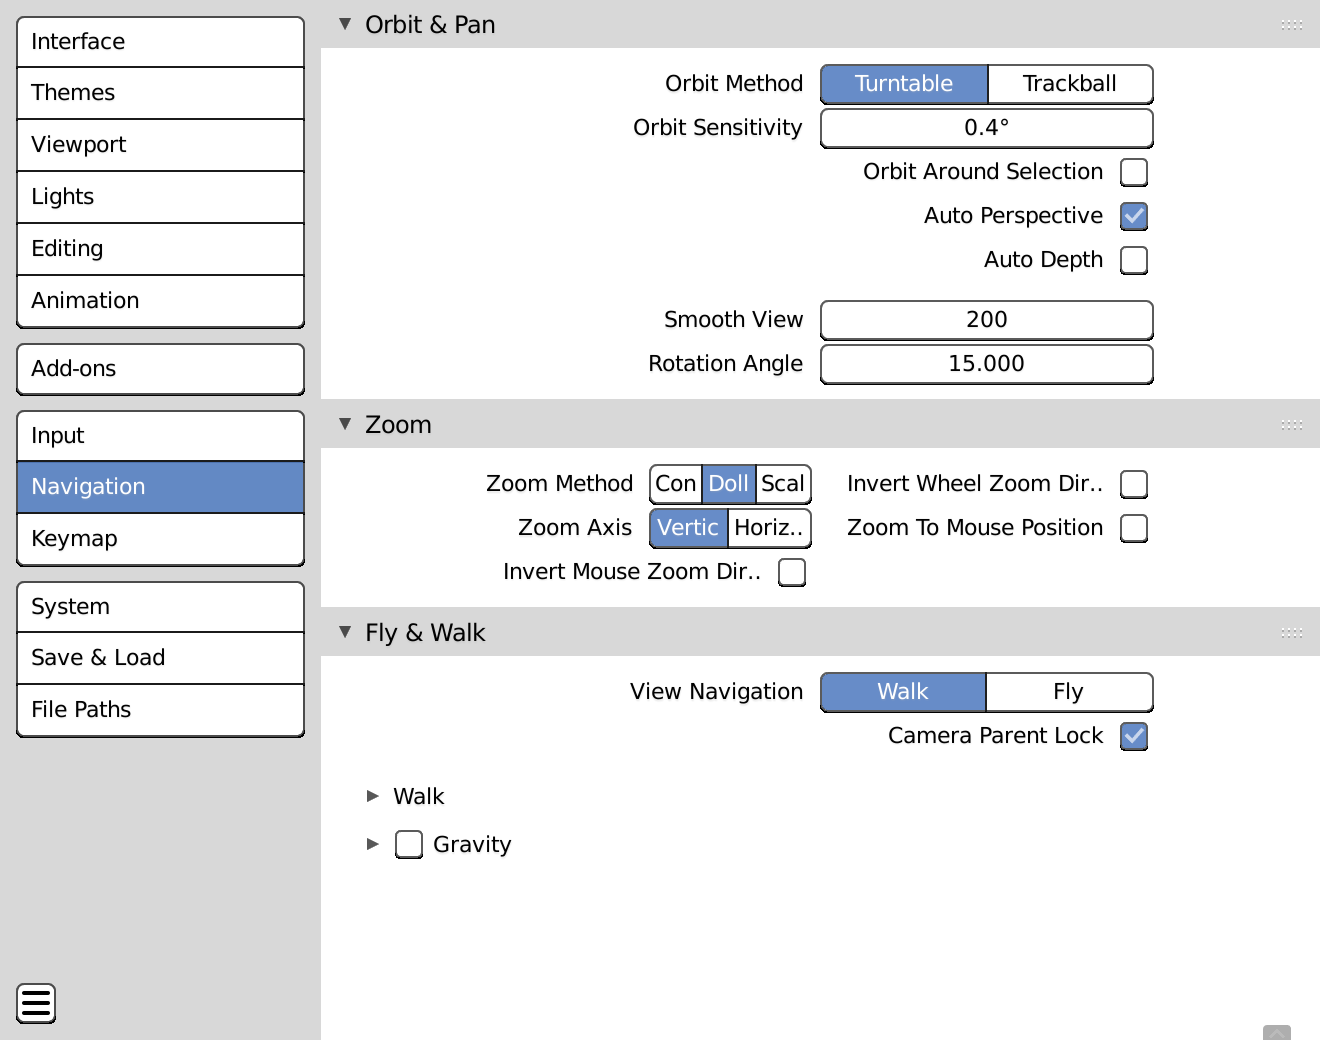
The Navigation section of the Preferences editor specifically controls how you move around in the 3D Viewport. The defaults work fine, and they’re what are assumed within the text of the book. The following figure shows what you see when you bring up the Navigation section of Preferences.
If you’re coming from another 3D application or you find that the default behavior isn’t to your taste, some of these settings may make things more comfortable for you:
- Orbit & Pan: The settings in this panel dictate how you move around the 3D Viewport.
- Orbit Method: By default, Blender uses the Turntable setting. However, some users have difficulty navigating to a particular part of their scenes or models when using Turntable setting. For them, the Trackball setting may be more comfortable.
The difference between the two settings may seem subtle to a new user, but if you’re used to one orbit style, it can be very disorienting to try working in the other. - Auto Depth: If you tend to create large environment scenes, having this option enabled is often useful so that you can quickly navigate your way through your scene without becoming stuck.
- Smooth View: In my opinion, Smooth View is still one of the coolest convenience options added to Blender in recent history. As such, it deserves explicit mention here. By default, Smooth View is set to a value of 200. If you go to your 3D Viewport and click the camera icon in the upper right corner, the 3D Viewport smoothly animates the change from the default perspective view to the Camera’s perspective. Pretty slick, huh? The values in Smooth View are in milliseconds, with a maximum value of 1,000, or 1 second (although that’s a bit slow for most tastes). The default value of 200 works nicely, but play with it on your own and see what works best for you.
- Orbit Method: By default, Blender uses the Turntable setting. However, some users have difficulty navigating to a particular part of their scenes or models when using Turntable setting. For them, the Trackball setting may be more comfortable.
- Zoom: Whereas the Orbit & Pan panel gives you configuration options for how you move around your scene in the 3D Viewport, the Zoom panel gives you options for how you move in and out of your scene.
- Invert Zoom Direction: Similar to the Orbit Method option described earlier, some people are more comfortable scrolling forward to zoom out and back to zoom in. This setting gives users that option.
- Zoom To Mouse Position: A lot of applications, both in 2D and 3D, have a feature where you zoom to the location of your mouse cursor. Blender, on the other hand, zooms in to the center of the editor by default. If you’re more comfortable with the other behavior, then enable this check box.
If you enable Zoom To Mouse Position, I recommend that you also enable the Auto Depth check box in the Orbit & Pan panel. If you don’t, it’s possible for you to zoom in really close on something and be unable to move around very much without zooming back out.
- Fly & Walk: If you’re familiar with PC gaming, then you might be comfortable with the standard “WASD” keyboard controls for walking or flying around a 3D scene. Blender supports this navigation mode, activated by menu options at the bottom of the View@@–>Navigation menu or by using the Shift+Backtick (`) hotkey. The options in this panel give you control over Blender’s walk and fly behaviors.
Keymap
The Keymap section of the Preferences editor (show in the following figure) has the greatest influence over how you interact with Blender.
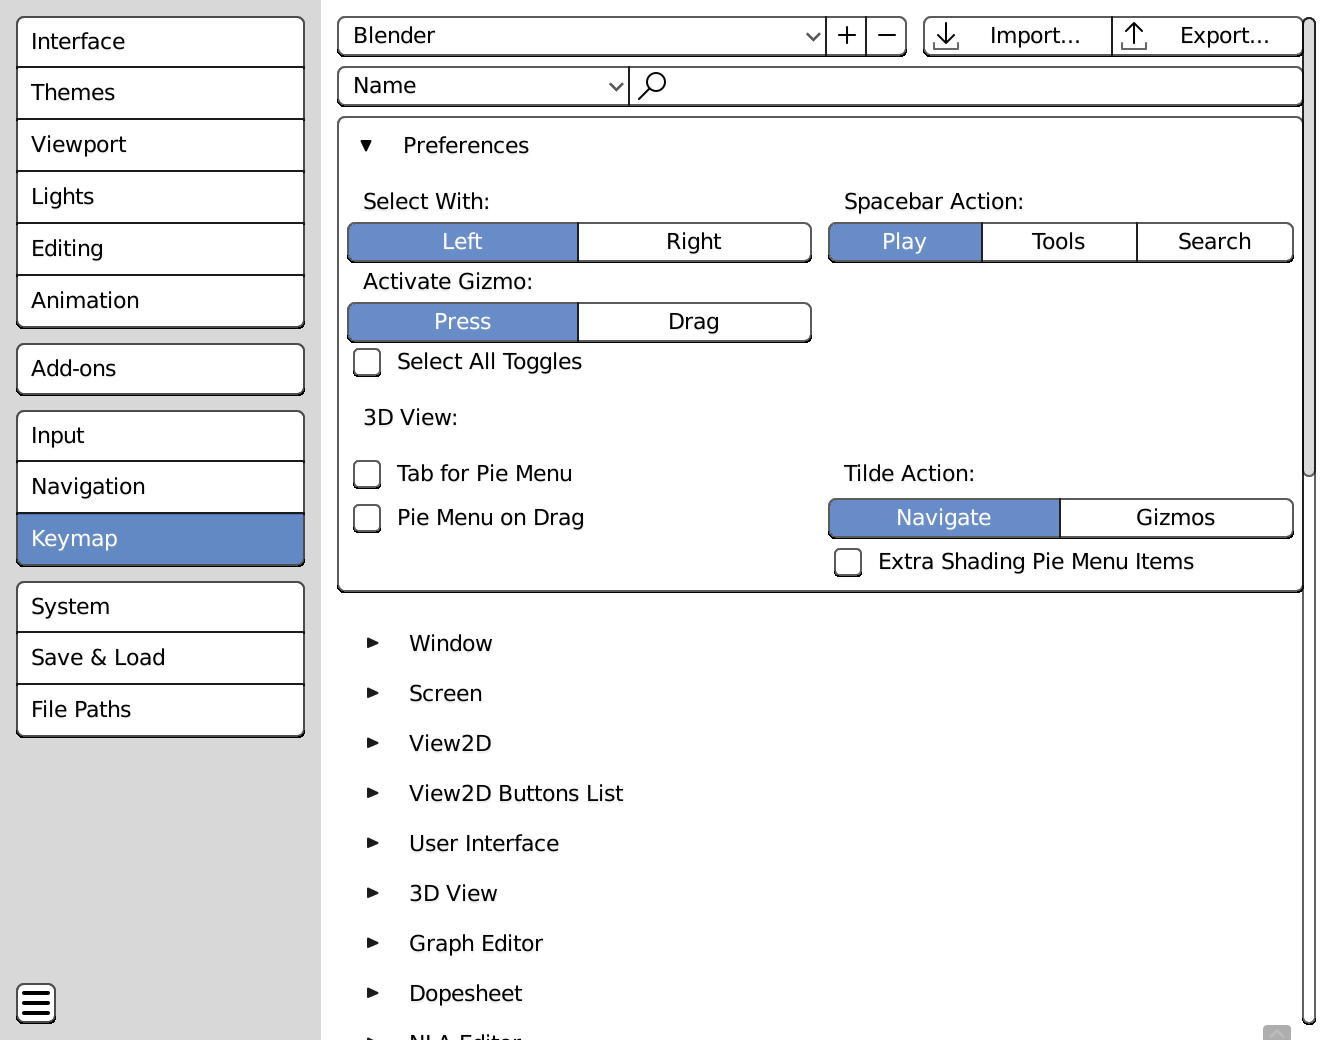
The details of this section are covered more extensively in the “Using custom event maps” section of Chapter 2. However, there are a few general options worth mentioning here:
- Presets: Blender ships with a small assortment of keymap preferences. In addition to the default preset, Blender also ships with a few presets that match the interaction styles of other popular 3D programs, including older versions of Blender, for veteran (lovingly referred to as “old fart”) Blender users like me. You can use this drop-down menu to choose an existing preset, create a new one, or delete a preset you never want to use. If you’re coming from another 3D application, you may be interested in trying the “Industry Compatible” keymap preset.
A keymap is more than just keyboard hotkeys. It also encompasses how you use the mouse as well.
- Select With: Blender’s default behavior is to select objects with the left mouse button. However people who are already comfortable with Blender’s former default behavior or using right-click to select may want to use this control to switch.
- Select All Toggles: This awkwardly worded check box activates a feature that long-time Blender users may be familiar with. In previous versions of Blender, pressing A would behave like a toggle. That is, if you had nothing selected, pressing A would select everything, but if you had anything selected, pressing A would deselect everything. This toggle behavior may sound strange if you’re not familiar with it, but it’s actually a very fast way of working and only requires that you remember one hotkey for selecting and deselecting everything, rather than two.
- Pie menu options: I strongly encourage the use of pie menus within Blender. I cover pie menus in Chapter 1. The next three toggles all relate to pie menus in Blender.
- Tab for Pie Menu: If you want to have additional pie menus without activating any additional add-ons, you can enable this check box. With this check box enabled, you get a pie menu when you press Tab in the 3D Viewport, instead of toggling in and out of Edit mode.
- Pie Menu on Drag: Enable this check box to get some advanced behavior for some pie menus. Instead of always showing the pie menu when you press the corresponding hotkey, you can either open a pie menu or trigger a toggle behavior. You can try this out with the Tab hotkey. With Pie Menu on Drag enabled, if you just press Tab, Blender quickly toggles in and out of Edit mode. However, if you press Tab and move your mouse cursor, this behavior triggers a pie menu for choosing which mode you want to activate. This way of working takes a little getting used to, but it can be very fast once you master it.
- Extra Shading Pie Menu Items: By default, pressing Z in the 3D Viewport can trigger a pie menu that lets you choose between Wireframe, Solid, Look Dev, and Rendered shading types. If you enable the Extra Shading Pie Menu Items check box, you get quick access to a couple more shading options like toggling all overlays and toggling X-ray view.
As of this writing, the Extra Shading Pie Menu Items option is kind of awkwardly aligned to the right side of the Preferences panel. It’s probably better-suited to be placed on the left. Hopefully that little alignment issue gets resolved in future releases. Figure 2-23 shows the Keymap section of the Preferences editor.
System
Whereas the majority of options in the Preferences editor dictate how you interact with Blender, the options in the System section, shown in the next figure, tend to dictate more how Blender interacts with you. Many options here are geared toward optimizing for performance, and generally the defaults work well.
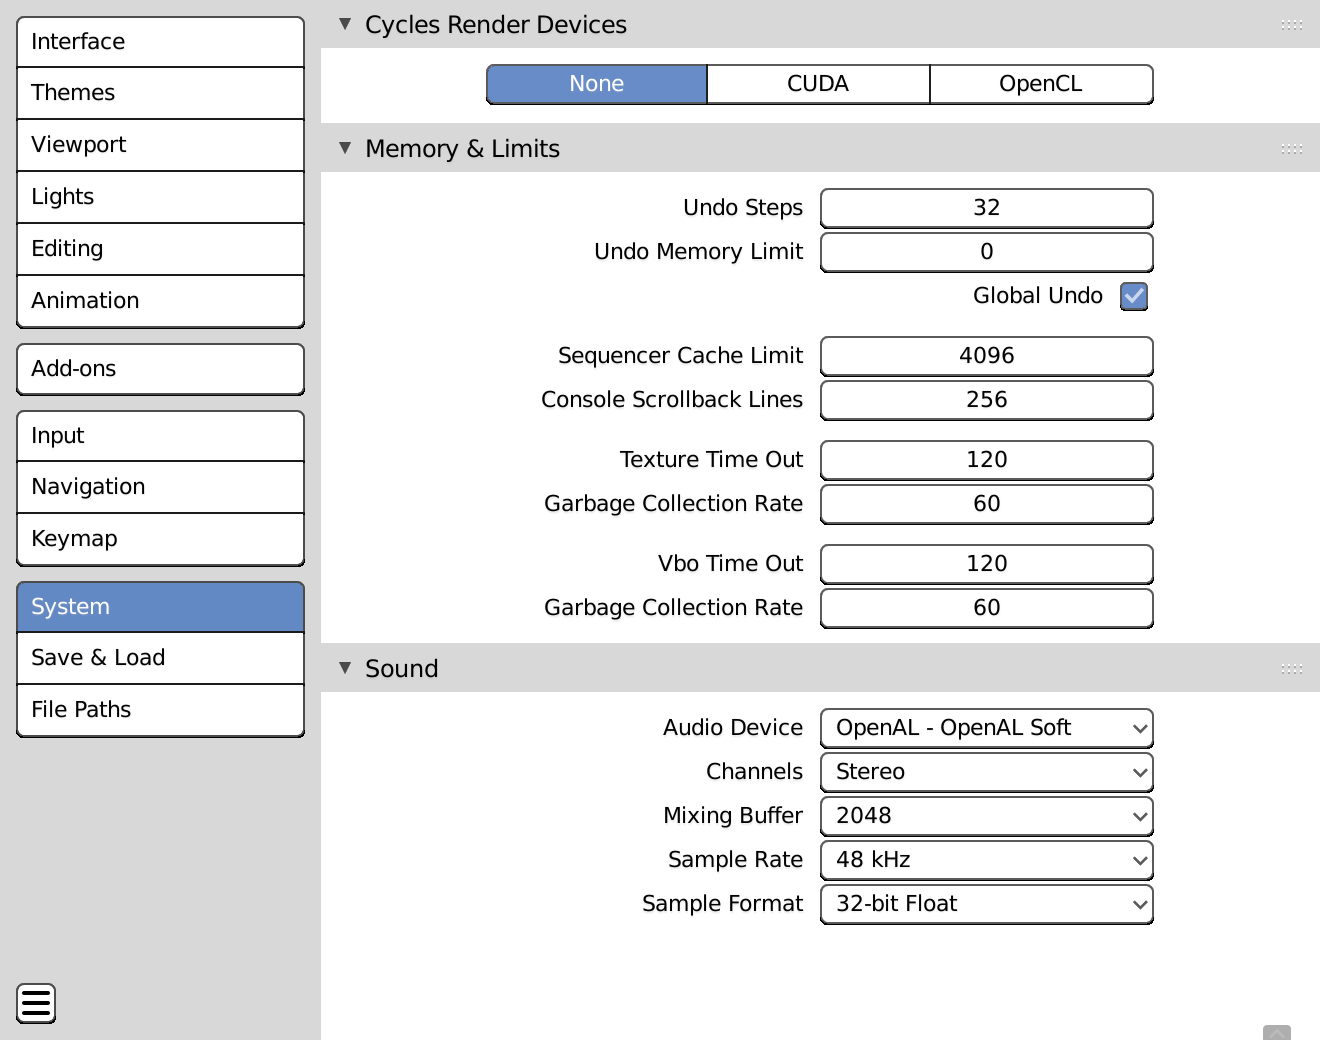
Some of the more interesting options follow:
- Cycles Render Devices: If you’re using Cycles as your renderer, the settings in this panel are pretty important. If your computer has a sufficiently powerful graphics processing unit (GPU) — usually this is your computer’s video card — Cycles can take advantage of that additional processing power, dramatically reducing the amount of time required for rendering. Depending on your GPU type, you’ll want to set this to either:
- CUDA (for NVIDIA GPUs)
- OpenCL (for AMD/ATI GPUs)
Upon picking either of these options, the panel expands to let you choose which compute devices you want to use. If you have a compatible GPU, you should have at least that GPU and your CPU as choices you can enable.
I might suggest that if your GPU is substantially more powerful than your CPU, then maybe you should disable your CPU as a render device. Otherwise, your GPU will render 90 percent of your image, and you’ll still be waiting on your CPU to finish the remaining 10 percent.
If you don’t have the kind of GPU that Cycles can take advantage of, there’s no need to worry. The Cycles Render Devices section defaults to None. In that case, Cycles will just use your CPU. You can read more about Cycles in Chapter 16.
- Memory & Limits: The options in this panel are pretty important for performance. In particular, you want to pay attention to the settings for controlling Blender’s undo feature. Here you can adjust how many steps of undo you have when working in Blender (default is 32), as well as toggle Global Undo on and off. Now, you may be wondering why in the world anyone would ever want to disable the ability to undo a mistake. The most common answer to this question is performance. Having undo enabled requires more memory from your computer, and each level of undo requires a little bit more. Sometimes, when working with very complex scenes or models, an artist might disable undo to dedicate all the computer’s memory to the current scene rather than the steps used to create it. This decision occurs most when artists work with Blender’s sculpting tools (see Chapter 6).
Save & Load
The controls in this section, shown in the following figure, relate to how Blender opens and saves files.

Some of the more interesting options are these:
- Load UI: Load UI is short for Load User Interface, meaning that when you open a
.blendfile, Blender adjusts your screen layout to match the one that was used to create that file. - Compress File: This option is handy because it makes your
.blendproject files smaller when you save. - Save Preview Images: When this option is enabled, each time you save, Blender embeds a small preview image of your current screen layout, as well as each texture and material in your project, into your
.blendfile. This way, you can use Blender’s File Browser to see materials and textures when you append or link from other files. Also, with this enabled,.blendfiles will show these previews in your operating system’s file manager. - Save Versions: Each time you manually save a file in Blender, it takes your last save and stores it as an earlier version. You may have already created work in Blender and noticed some
.blend1and.blend2files in the same place you saved your.blendfiles. Those.blend1and.blend2files are the earlier versions. This option allows you to determine how many of these earlier versions you’d like Blender to retain for you. Each version has a number appended to the end of it, so if you haveMyFile.blendand you have Save Versions set at 2, then after a few saves, you should seeMyFile.blend,MyFile.blend1, andMyFile.blend2all in the same folder. - Recent Files: The number in this field tells Blender how many of your past files to remember when you choose File→Open Recent or press Shift+Ctrl+O. You can also use the File Browser (Ctrl+O) and look on the sidebar under the Recent heading.
- Auto Save: Before Blender had undo functionality, users relied heavily on its auto-save features. Even in the age of undo, these options are a lifesaver, so the controls in this sub-panel are especially helpful.
- Auto Save Temporary Files: Enabled by default, this option is Blender’s auto-save functionality. It saves a copy of the current state of your file, or what I call a “hot backup,” in your Temporary Files directory (adjustable in the File Paths options covered next) every few minutes.
- Timer (mins): The value in this field controls how frequently Blender creates automatically saved hot backups. By default, Blender does this every 2 minutes.
- Auto Run Python Scripts: As a security feature, the Auto Run Python Scripts check box is disabled. This provides a bit of a safeguard in the event that you download a
.blendfile from the Internet and run it in Blender, preventing potentially dangerous scripts from running right when you open the file. At the same time, this feature can prove to be quite frustrating if you don’t download a lot of.blendfiles from untrusted sources and you have animation rigs that rely on Python to work. If that’s the case and you trust every.blendfile that you open, you can enable this check box. - File Browser: The check boxes in this panel set the default filter-and-view options for Blender’s File Browser. The defaults are a fine place to start, though you may want to enable the Show Thumbnails toggle so Blender defaults to thumbnail view for folders with videos and images.
File Paths
Like most programs, Blender works with files. The values in this section show the default locations where Blender either places files or looks for them. Here you can indicate where your fonts are located, where you want to save your renders by default, and where to look for textures and sounds.
Probably the most important path in this section is the one for Temporary Files. This location is where Blender stores auto-save files, and it’s also where it stores the notorious quit.blend file, which is great for recovering your last blender session. The default location for temporary files is /tmp/ on Linux and Mac OS X. On Windows, it’s your user’s temporary folder in C:\Users\<Your Username>\AppData\Local\Temp\.
Warning
Linux users may want to change this location because some Linux distributions like Ubuntu automatically clear the
/tmpdirectory on each boot. I can’t tell you the number of people who have closed Blender without saving their work and later realized that they couldn’t recover any of their work because this path wasn’t properly set.
The following figure shows the settings in this section of the Preferences editor.
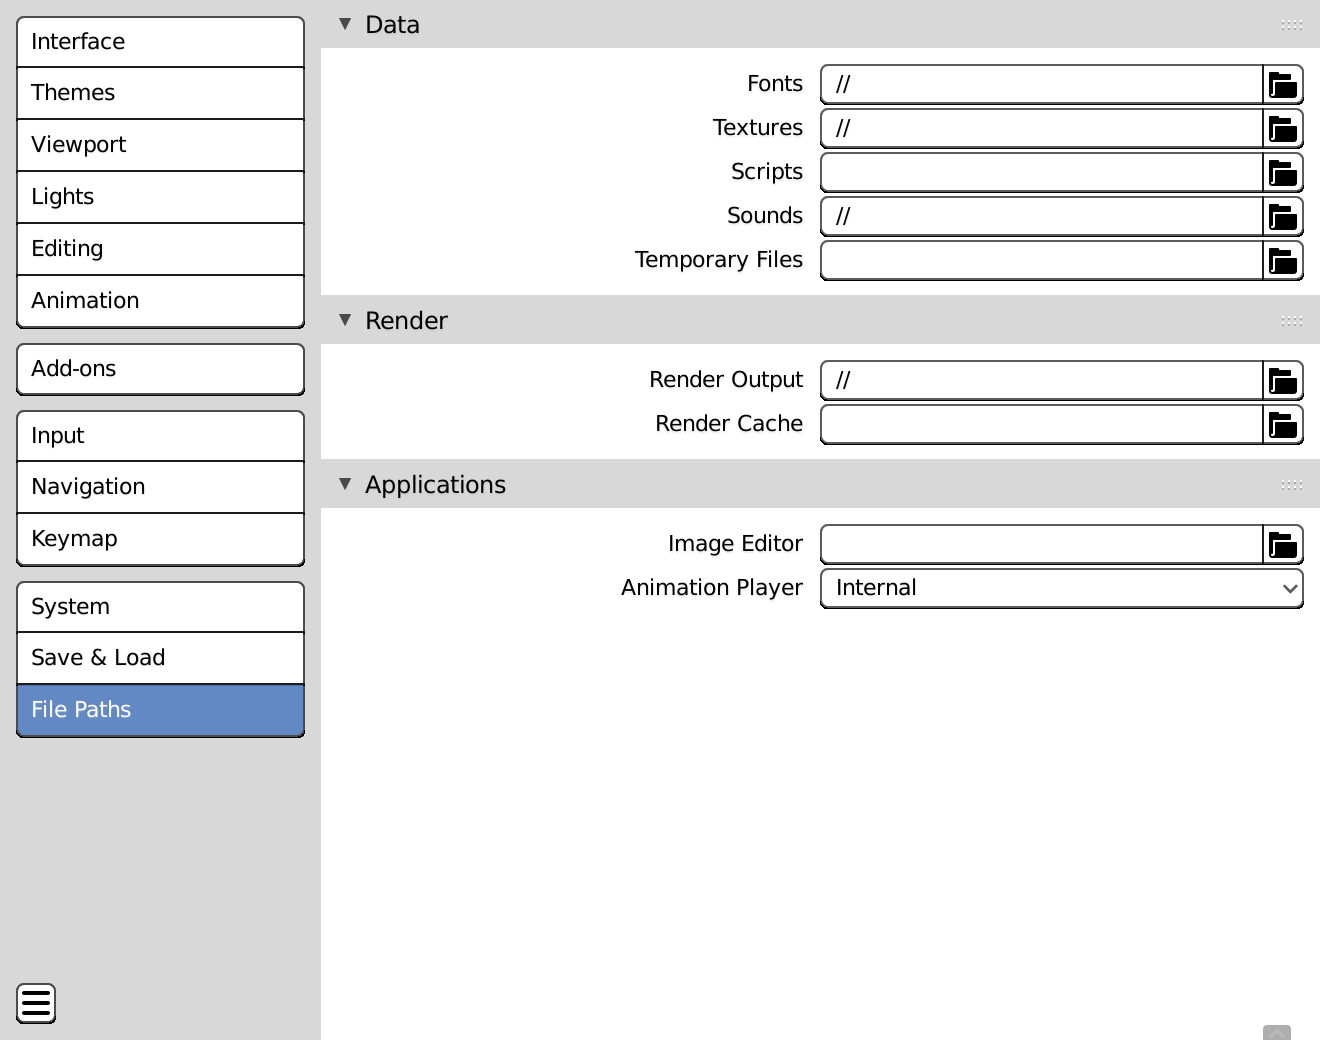
Some file paths begin with two forward slashes (//). These slashes are Blender’s notation for a relative path, or file path as it relates to the location on your hard drive of your current file. In contrast is an absolute path, which is the full path to your file from the root of your file system. For example, if you have a file saved as /home/user/Documents/project.blend, then the absolute path to project.blend is /home/user/Documents/. Now say that you have a folder named textures in the same folder as your project.blend file, and in that folder is an image named sandpaper.png. The absolute path to that image is /home/user/Documents/textures/, whereas its relative path (relative to project.blend) is //textures.
